GitHub, Git, and Math 335
Introduction
Version control systems (VCS) allow developers to maintain a record of how their code has changed over time. When used properly, a VCS can help a developer track down the exact point in time when a bug was introduced or fixed, easily undo changes, and collaborate with other developers.
There are many types of version control systems. Some of the more popular ones include CVS, subversion, mercurial, and git. In recent years, git has quickly become the most popular of the group.1
Git stores files in a type of database called a repository or repo. Most data science teams that work with git keep a central repository on a server somewhere that everyone on the team can access. This repository stores the files and the history of every change made to each file, including who made the changes and when those changes were made.
Git works with groups of changes called commits. A single commit might have many changes associated with it. Those changes might include updates to, existing files, the addition of new files, or the removal of files. Git can be used locally by you on a single computer to track changes in a project. You do not need to be connected to the internet to use Git. However if you want to share your work with a larger audience, the easiest solution is to host the repository on a web site for others to download and inspect. You can host a public (open to the world) or private (open to just you or a few individuals) repository. GitHub has become the largest hoster of Git repositories and includes many useful features beyond the standard Git functions.
Chances are that by now you’ve seen or even used GitHub. Professionally, you should know how to use Git and GitHub to manage projects and share code. In this class, we will use Git and GitHub for collaboration.
Git Installation
Git Installation: Windows
Install Git for Windows, also known as msysgit or “Git Bash”, to get Git in addition to some other useful tools, such as the Bash shell. Yes, all those names are totally confusing, but you might encounter them elsewhere and I want you to be well-informed.
This method of installing Git for Windows leaves the Git executable in a conventional location, which will help you and other programs, e.g. RStudio, find it and use it. This also supports a transition to more expert use, because the “Git Bash” shell will be useful as you venture outside of R/RStudio.
- When asked about “Adjusting your PATH environment”, make sure to select “Git from the command line and also from 3rd-party software”. Otherwise, we believe it is good to accept the defaults.
- Note that RStudio for Windows prefers for Git to be installed below
C:/Program Filesand this appears to be the default. This implies, for example, that the Git executable on my Windows system is found atC:/Program Files/Git/bin/git.exe. Unless you have specific reasons to otherwise, follow this convention.
If you follow these instructions and install RStudio version 1.1 or higher, you can use the shell (also called the terminal) directly from within RStudio. See this article for more information on how to use it and setup RStudio to use Git Bash, rather than the Command Prompt.
Git Installation: Mac OS X
Mac OS X already includes the shell, so all you need to do is install Git.
Option 1 (highly recommended)
Install the Xcode command line tools (not all of Xcode), which includes Git.
Go to the shell and enter one of these commands to elicit an offer to install developer command line tools:
git --version
git config
Accept the offer! Click on “Install”.
Here’s another way to request this installation, more directly:
xcode-select --installWe just happen to find this Git-based trigger apropos.
Note also that, after upgrading macOS, you might need to re-do the above and/or re-agree to the Xcode license agreement. We have seen this cause the RStudio Git pane to disappear on a system where it was previously working. Use commands like those above to tickle Xcode into prompting you for what it needs, then restart RStudio.
Option 2 (recommended)
Install Git from here: http://git-scm.com/downloads.
- This arguably sets you up the best for the future. It will certainly get you the latest version of Git of all approaches described here.
- The GitHub home for the macOS installer is here: https://github.com/timcharper/git_osx_installer.
- At that link, you can find more info if something goes wrong or you are working on an old version of macOS.
Git Installation: Linux
If Git is not already available on your machine you can try to install it via your distro’s package manager.
Debian/Ubuntu
sudo apt-get install git
Fedora/Redhat Linux
sudo yum install git
Personalize Git
You only have to do this once per machine.
In order to track changes and attribute them to the correct user, we need to tell Git your name and email address.
Option 1: use usethis
The usethis package includes helpful functions for common setup and development operations in R. Install it by running the command
install.packages("usethis")from the console in RStudio. Then run the following commands:
library(usethis)
use_git_config(user.name = "hathawayj", user.email = "hathawayj@byui.edu")
Replace hathawayj and hathawayj@byui.edu with your name and email address. Your name could be your GitHub username, or your actual first and last name. Your email address must be the email address associated with your GitHub account.
Option 2: use the shell
Open the shell on your computer. From there, type the following commands (replace the relevant parts with your own information):
git config --global user.name 'hathawayj'- This can be your full name, your username on GitHub, whatever you want. Each of your commits will be logged with this name, so make sure it is informative for others.
git config --global user.email 'hathawayj@byui.edu'- This must be the email address you used to register on GitHub.
You will not see any output from these commands. To ensure the changes were made, run git config --global --list.
Using Git within RStudio
RStudio can only act as a GUI front-end for Git if Git has been successfully installed AND RStudio can find it.
A basic test for successful installation of git is to simply enter git in the shell. If you get a complaint about git not being found, it means installation was unsuccessful or that it is not being found, i.e. it is not on your PATH.
If you are not sure where the git executable lives, try this in a shell:
which git(Mac, Linux)where git(most versions of Windows)
If Git appears to be installed and findable, launch RStudio and try again. If it still doesn’t work, quit and re-launch RStudio if there’s any doubt in your mind about whether you opened RStudio before or after installing Git.
From RStudio, go to Tools > Global Options > Git/SVN and make sure that the box Git executable points to the Git executable. It should read something like:
/usr/bin/git(Mac, Linux)C:/Program Files (x86)/Git/bin/git.exe(Windows)
If you make any changes, restart RStudio and try the steps at the top of the page again.
Still not working? Try googling your problem or speak with myself or the TA.
Test Drive RStudio and GitHub
Step 1: Create a GitHub repo
- Go to GitHub.com and login.
- Click the green “New Repository” button
- Repository name:
myrepo - Public
- Check Initialize this repository with a README
- Click the green “Create repository” button
- Repository name:
- Copy the HTTPS clone URL to your clipboard via the green “Clone or Download” button.
Step 2: Clone GitHub repo with RStudio
In RStudio, start a new Project:
- File > New Project > Version Control > Git. In the “repository URL” paste the URL of your new GitHub repository. It will be something like
https://github.com/hathawayj/myrepo.git.- Do you NOT see an option to get the Project from Version Control? Make sure RStudio can find Git (see above).
- Decide where to store the local directory for the Project. Don’t scatter everything around your computer - have a central location, or some meaningful structure. For repositories you create in this course, you can setup a
/cfssdirectory and clone all your repos there. - I suggest you check “Open in new session”, as that’s what you’ll usually do in real life.
- Click “Create Project” to create a new sub-directory, which will be all of these things:
- a directory on your computer
- a Git repository, linked to a remote GitHub repository *an RStudio Project
- Whenever possible, this will be the preferred route for setting up your R projects.
This should download the README.md file that we created on GitHub in the previous step. Look in RStudio’s file browser pane for the README.md file.
Why setup your R projects this way? There’s a big advantage to the “Github first, then RStudio”" workflow: the remote GitHub repo is now the “upstream” remote for your local repo. In essence, you are already setup to push and pull commits to GitHub. There is no need to set anything else up through the shell or a Git client. If you would like to connect GitHub to a previously created R-Studio project you can follow this guide.
Step 3: Change, save, commit
Do this every time you finish a valuable chunk of work, probably many times a day.
- From RStudio, modify the
README.mdfile by adding the line “This is a line from RStudio”. Save your changes. - Commit these changes to your local repo. How?
- From RStudio:
- Click the “Git” tab in the upper right pane.
- Check the “Staged” box for any files whose existence or modifications you want to commit.
- To see more detail on what’s changed in file since the last commit, click on “Diff” for a Git pop-up.
- If you’re not already in the Git pop-up, click “Commit”
- Type a message in “Commit message”. This should describe for a human what modifications you’ve made to the staged files.
- Click “Commit”.
Step 4: Push commits to GitHub
Do this a few times a day, but possibly less often than you commit.
You have new work in your local Git repository, but the changes are not online yet.
Before you push your changes to GitHub, first you should pull from GitHub. Why? If you make changes to the repo in the browser or from another machine or (one day) a collaborator has pushed, you will be happier if you pull those changes in before you attempt to push.
Click the blue “Pull” button in the “Git” tab in RStudio. I doubt anything will happen, i.e. you’ll get the message “Already up-to-date”. This is just to establish a habit.
Now click the green “Push” button to send your local changes to GitHub. You should see some message along these lines.
[master dc671f0] blah
 3 files changed, 22 insertions(+)
 create mode 100644 .gitignore
 create mode 100644 myrepo.Rproj
Now just rinse and repeat. Do work somewhere. Commit it. Push it or pull it depending on where you did it, but get local and remote “synced up”.
MCS 335 Git Process
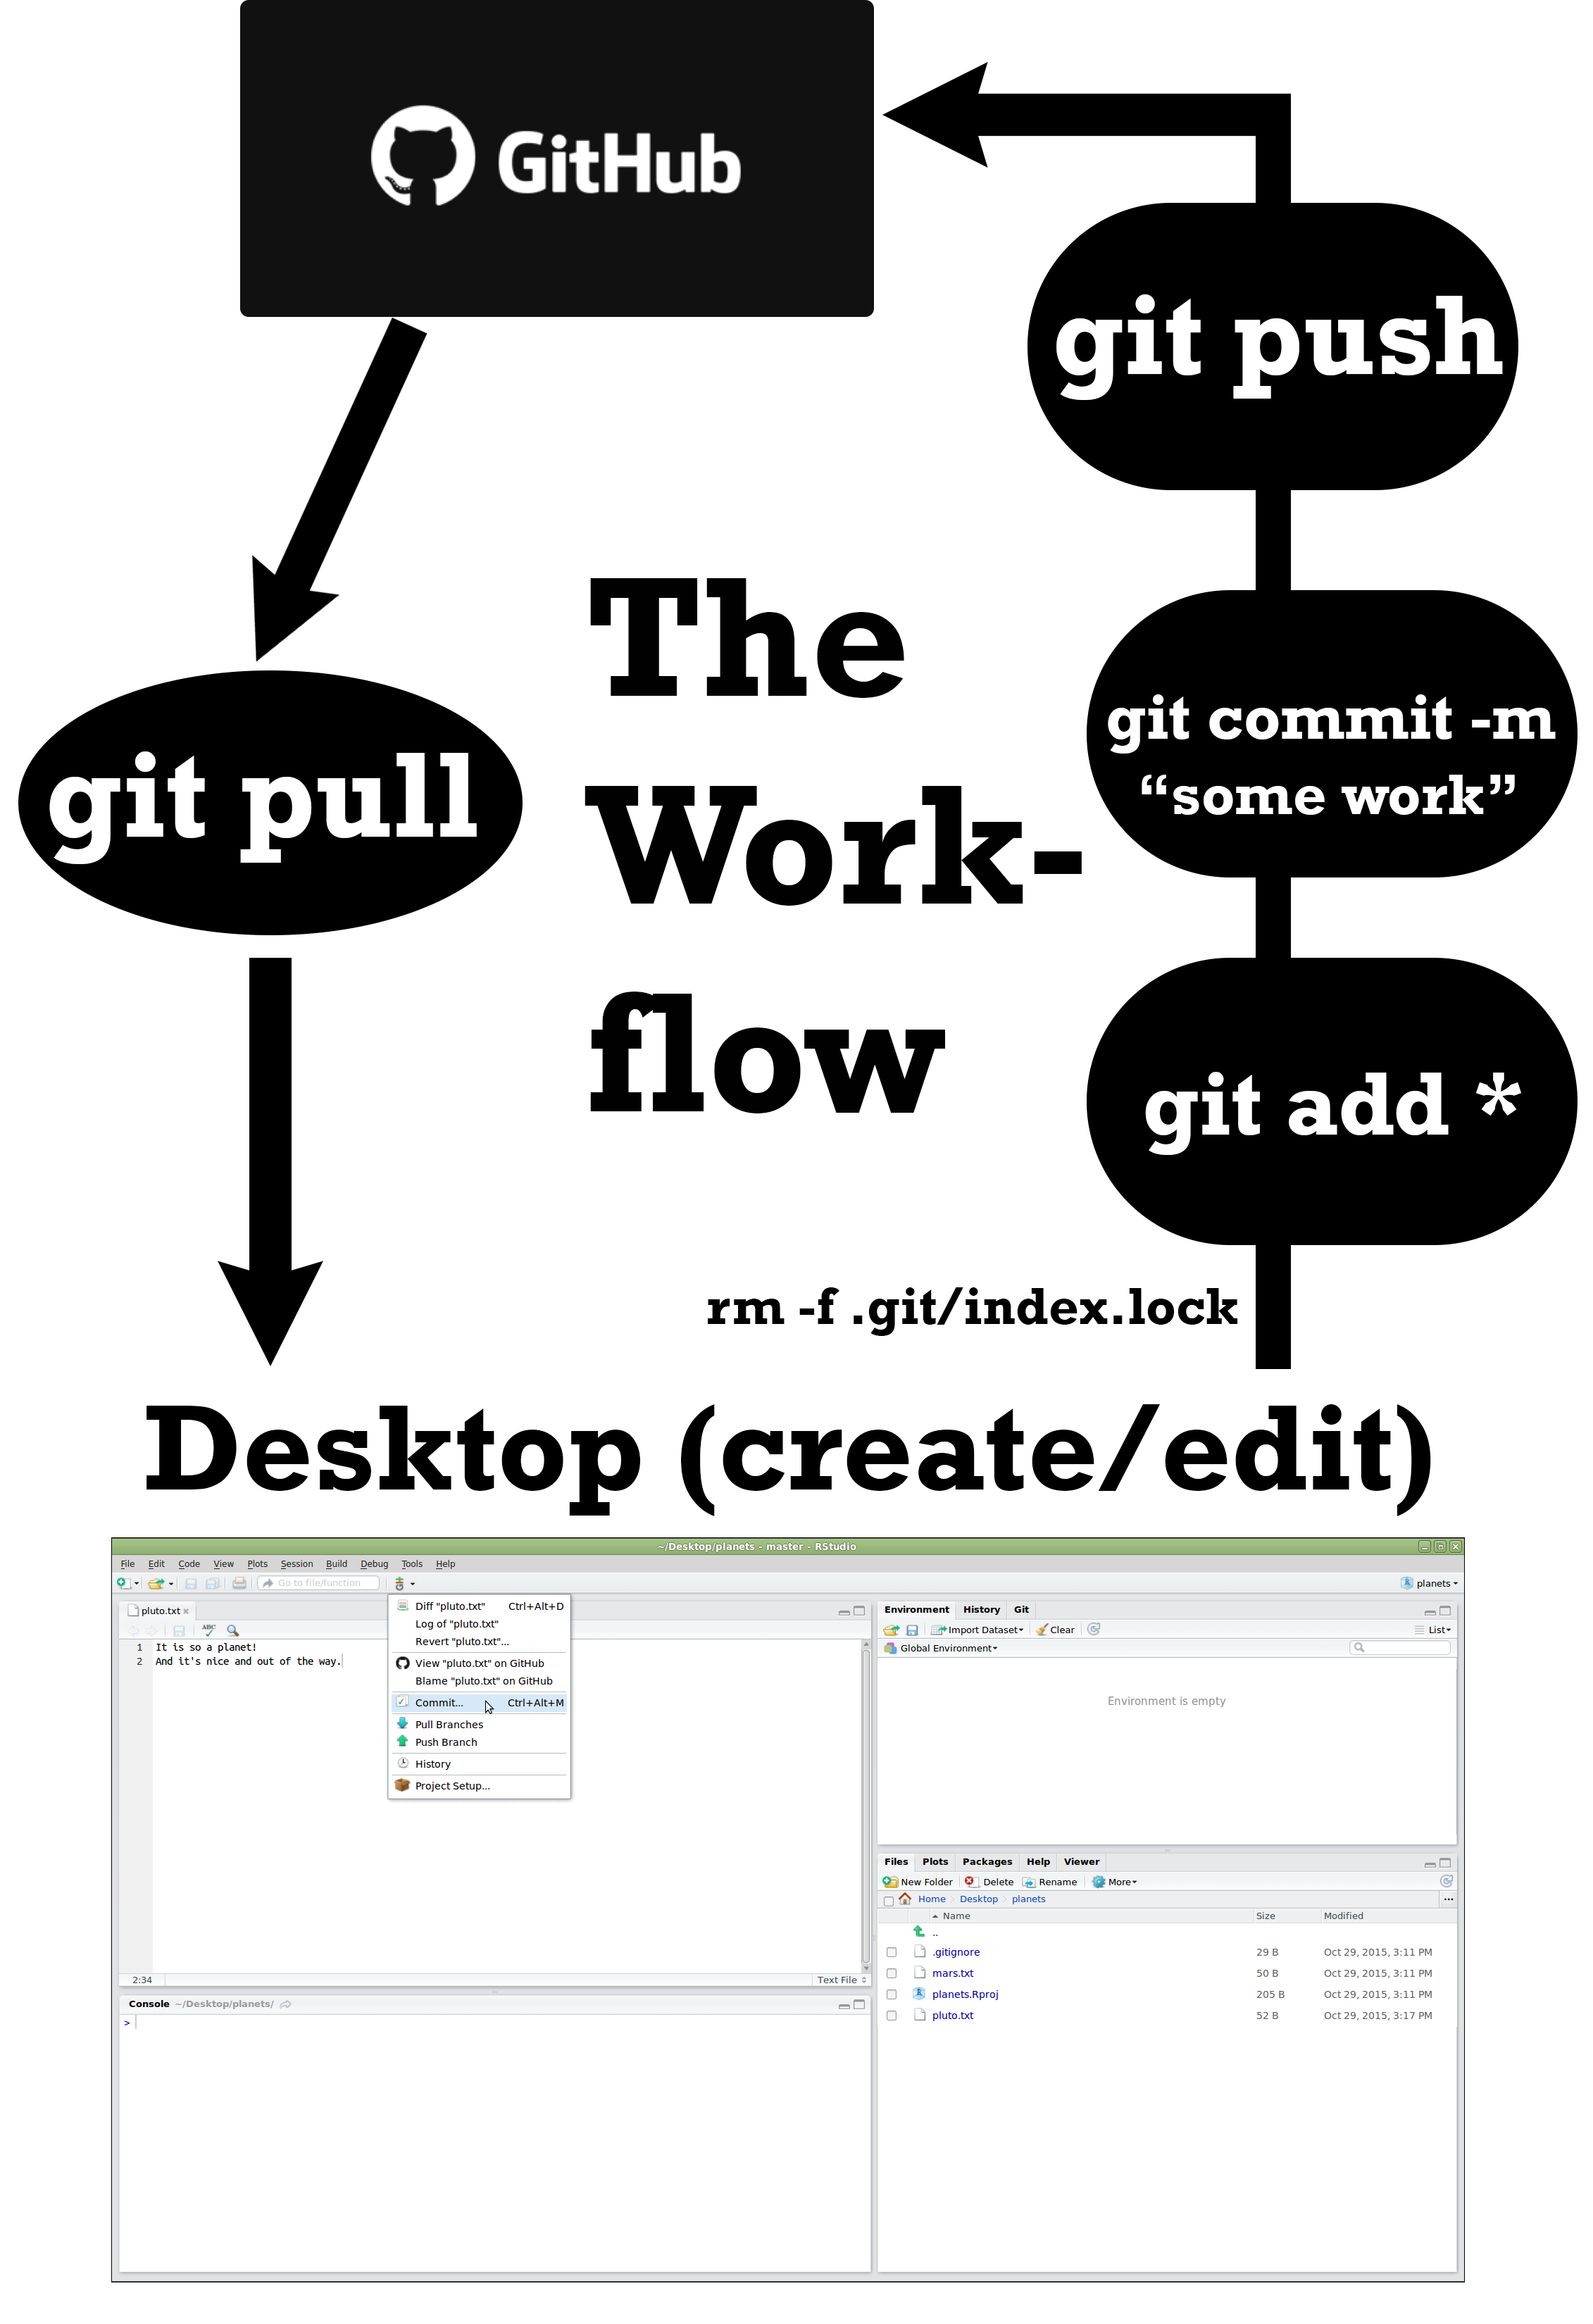
As we are getting introduced to git and GitHub, you will be the only one that is working with your repository. This will make the git pull less used in our day-to-day workflow. We will only need to get the workflow for adding files from our local repository to the GitHub central repository.
After you have linked your GitHub repo with your local computer, then the commands on the right side of the below image are the ones that will be used each time you move files to GitHub. Note the command rm -f .git/index.lock. At times this will need to be used when you get an error from Git that your files are locked. After running the previous command, we can then move through the process as usual2.
This video provides a succinct overview of the use of Git with the R-Studio graphical user interface (GUI).
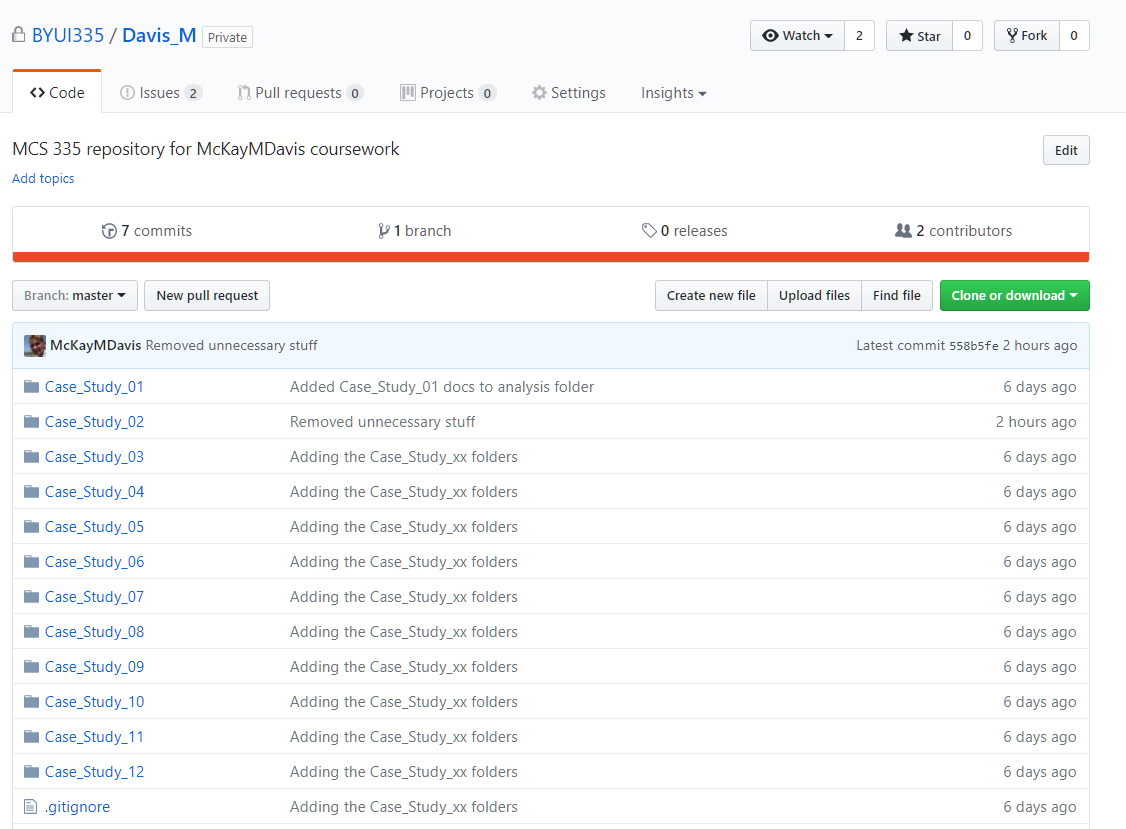
MCS 335 Folder Structure
After syncing your local computer with your class repository that we created for your local repo should match the folder structure in the following two images.

This material was lifted from https://byui-cs.github.io/CS246/week-04/prepare.html, https://byui-cs.github.io/CS246/week-04/teach.html, and https://cfss.uchicago.edu/setup/what-is-git/.↩︎
https://stackoverflow.com/questions/9282632/git-index-lock-file-exists-when-i-try-to-commit-but-cannot-delete-the-file↩︎